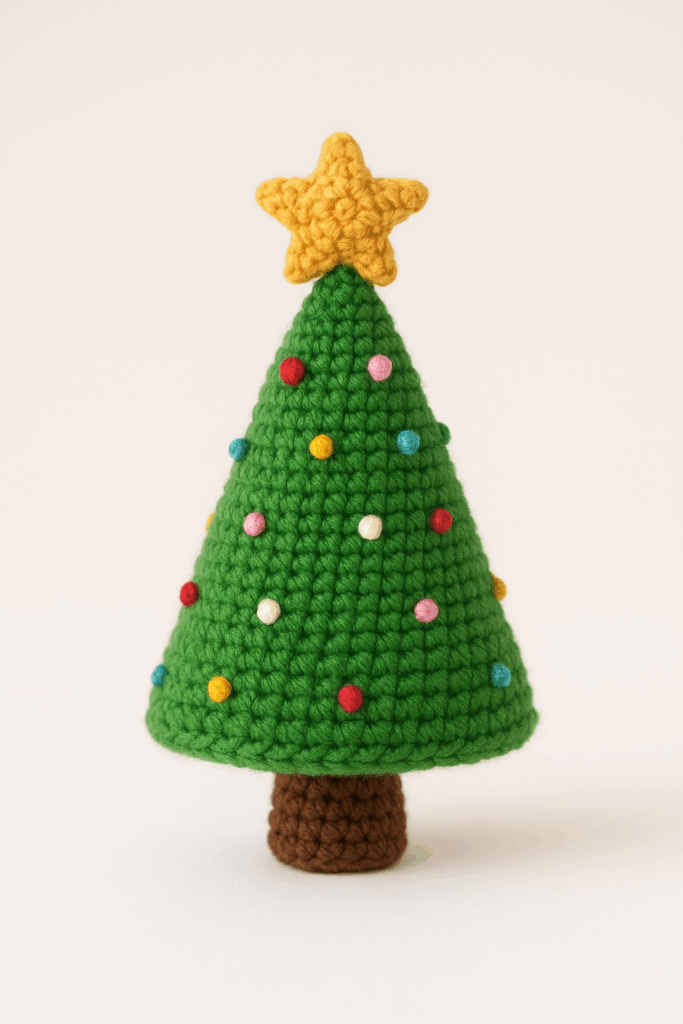
Crochet Christmas Tree Tutorial – A Festive Handmade Decoration for the Holidays
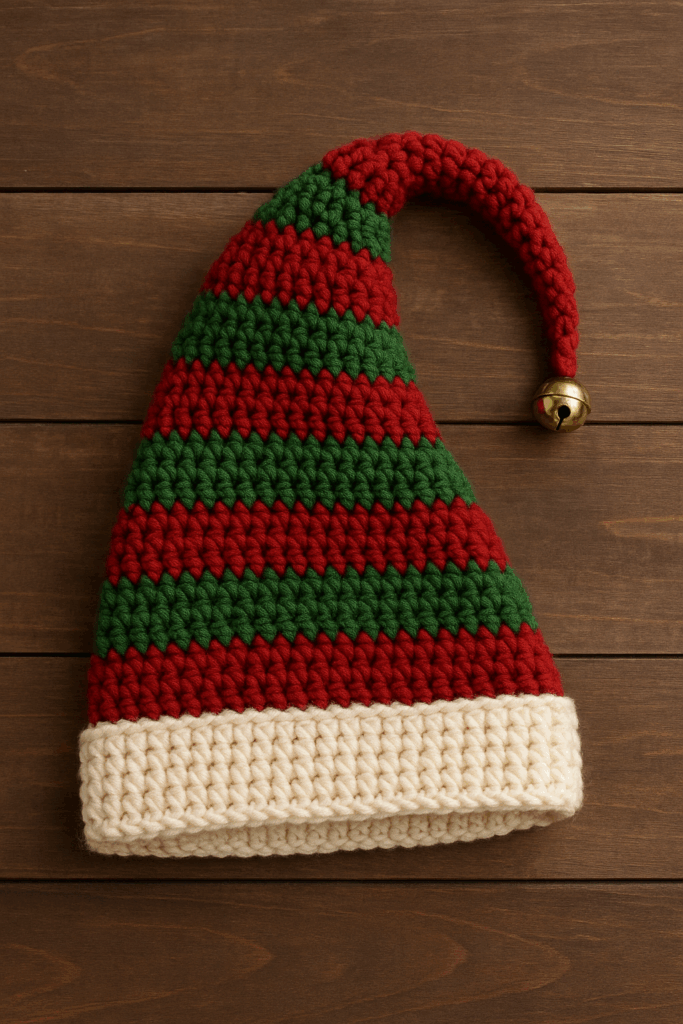
If you’ve ever dreamed of adding a touch of fantasy to your holiday season, a crochet elf hat is the perfect project. This fun and whimsical accessory brings Christmas cheer to life, whether you’re making it for a festive costume, a themed party, or a handmade gift. With its signature long tail and jingle bell tip, the elf hat is a timeless crochet project for all skill levels.
In this tutorial, we’ll walk you through everything you need to know — from choosing the right yarn and hook size to creating the signature curved top. By the end, you’ll have a beautiful handmade elf hat ready to spread joy all season long.
Before diving into your stitches, make sure you have the following materials ready. Choosing the right yarn and hook will ensure your elf hat has the perfect blend of structure and comfort.
Materials List:
Gauge (optional but helpful):
12–14 stitches = 4 inches in double crochet.
Pro Tip:
If making the hat for a child or adult, measure the head circumference first. For example:
Adjust your starting chain accordingly to ensure a comfortable fit.
Now, let’s begin crafting your Elf Hat from the base up!
As the rounds progress, the hat will naturally curve upward into a tall cone shape. Continue decreasing until you have about 8–10 stitches left.
When the hat reaches your desired length (about 15–20 inches for a playful long-tail effect), finish off by pulling the yarn through the last loop and tightening it securely.
Now you have a perfectly shaped elf hat ready to enchant the holidays!
The beauty of crocheting your own elf hat is that you can make it truly one-of-a-kind. Try experimenting with different textures, colors, and decorative details to suit your personal style or holiday theme.
Creative Variations:
For the Family:
You can easily adjust the pattern to make matching elf hats for everyone — from babies to adults — simply by increasing or decreasing your foundation chain and number of rounds.
Pro Tip:
Try using metallic yarn or glittery thread for a shimmering finish that catches the light under Christmas tree glow!
Your handmade crochet elf hat is not just an accessory — it’s a celebration of creativity, patience, and festive spirit. To make sure it lasts for years of holiday cheer, follow these care tips:
Washing Instructions:
Storage Tips:
Crocheting an elf hat is a rewarding and joyful experience that captures the essence of the holiday season. Whether you’re gifting it, wearing it, or displaying it as part of your festive décor, it’s sure to bring smiles wherever it goes.
So grab your yarn, settle into your favorite cozy spot, and let your imagination lead the way. With each stitch, you’re crafting not just a hat — but a little piece of Christmas magic.


