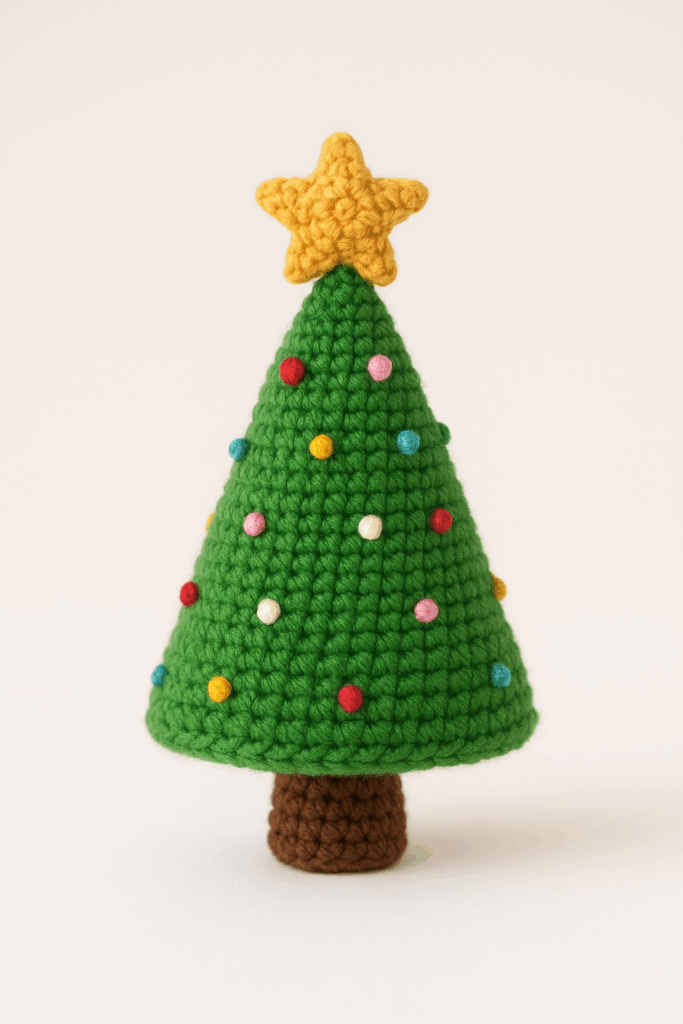
The holiday season is the perfect time to bring warmth and creativity into your home — and what better way to do that than by making your very own crochet Christmas tree? This project combines the cozy charm of handmade art with the sparkle of Christmas, creating a beautiful decoration that can be displayed on tables, mantels, or even gifted to loved ones.
A crocheted Christmas tree adds a touch of whimsy and elegance to your festive décor. Whether you’re a beginner looking for a fun seasonal project or an experienced crocheter wanting to add to your holiday collection, this tutorial will guide you step-by-step through making a lovely tree that captures the spirit of Christmas.
Before starting your project, gather all the materials needed. The right yarn and hook will give your Christmas tree the perfect shape and texture.
Materials List:
Optional Accent Colors:
Pro Tip:
Use yarn with metallic threads for extra sparkle, or mix two strands (one plain green and one glittery) for a shimmering effect.
Let’s start crocheting your festive tree! This tutorial creates a cone-shaped Christmas tree made from simple stitches, making it ideal for beginners.
As the rounds progress, your piece will naturally start forming a cone.
Pro Tip:
If you want a fuller, layered look, add a round of half-double crochets (HDC) every few rows to slightly tighten the shape.
Once your cone is finished, you’ll need to give it structure.
Your base is now ready and firm enough to stand on its own or sit on a decorative base.
If you’d like to include a tree trunk, follow these quick steps:
You can glue or stitch the trunk to a small wooden slice or decorative base for stability.
This is where your creativity shines! You can decorate your crochet Christmas tree in countless ways to match your holiday theme.
Ideas for Decorations:
Pro Tip:
For an extra-festive look, use multicolored yarn or create multiple trees in different sizes to make a forest-style centerpiece.
Once you’ve mastered the basic design, you can experiment with different styles to make your crochet Christmas tree unique.
1. Layered Tree:
Instead of a simple cone, crochet several green “ruffled” layers or tiers. Start each layer with a base ring and work shell stitches around the edges for a branch-like effect.
2. Snowy Tree:
Use white yarn to make a smaller cone and place it over the green one for a “snow-dusted” look.
3. Tabletop Forest:
Make a set of trees in different shades of green and heights for a cozy decorative display.
4. Tree Ornaments:
Shrink the pattern down using thinner yarn and a smaller hook to create mini crochet trees you can hang on your real Christmas tree.
5. Gift Decorations:
Attach small crochet trees to holiday presents as a handmade embellishment that doubles as a keepsake.
Each variation adds a touch of personality and charm — making your handmade trees truly one-of-a-kind.
Your crochet Christmas tree is ready to shine! To keep it looking beautiful for many seasons to come, follow these simple care and display tips.
Care Instructions:
Display Ideas:
Final Thoughts:
A crochet Christmas tree isn’t just a decoration — it’s a piece of art that reflects the love and care of the maker. Every stitch holds the warmth of the season, making it a timeless addition to your holiday décor.
Whether you keep it simple or decorate it with glittering details, your handcrafted tree will spread festive cheer year after year. So grab your yarn, put on some Christmas music, and let your creativity light up the holidays!