Mini Crochet Christmas Wreath: A Charming Handmade Holiday Decoration
Crochet is one of the most versatile and charming crafts, allowing simple yarns to be transformed into functional and decorative pieces. Among the many creative options, the cat crochet holder has become a trend, especially among pet lovers and those who enjoy handmade decoration. In addition to being a charming piece, it can be used to hold plant pots, store small objects, or simply decorate a room with unique style.
In this article, you will find a complete guide with 6 steps, from the required materials to the detailed tutorial for creating your own cat-shaped crochet holder.
The cat crochet holder is a handmade piece usually crafted with cotton yarn or twine, often with a circular or square base, featuring a stylized cat design.
It can be made as a basket, a hanging plant holder, or even as a decorative wall piece. Beyond its usefulness, this type of crochet carries personality and affection, combining the beauty of handmade stitches with the delicacy of a cat’s figure, symbolizing coziness and elegance. It’s perfect for anyone who wants a unique handcrafted touch in their home or a special handmade gift.
Before starting, it’s essential to gather all the materials. This makes the process smoother and more enjoyable. Here’s what you’ll need:
💡 Tip: Choose high-quality yarn to ensure durability, especially if the holder will be used for hanging pots.
This project is beginner-friendly, as it relies on fundamental stitches. Here are the stitches you’ll need to know:
With just these stitches, you’ll be able to create a resistant and well-structured piece.
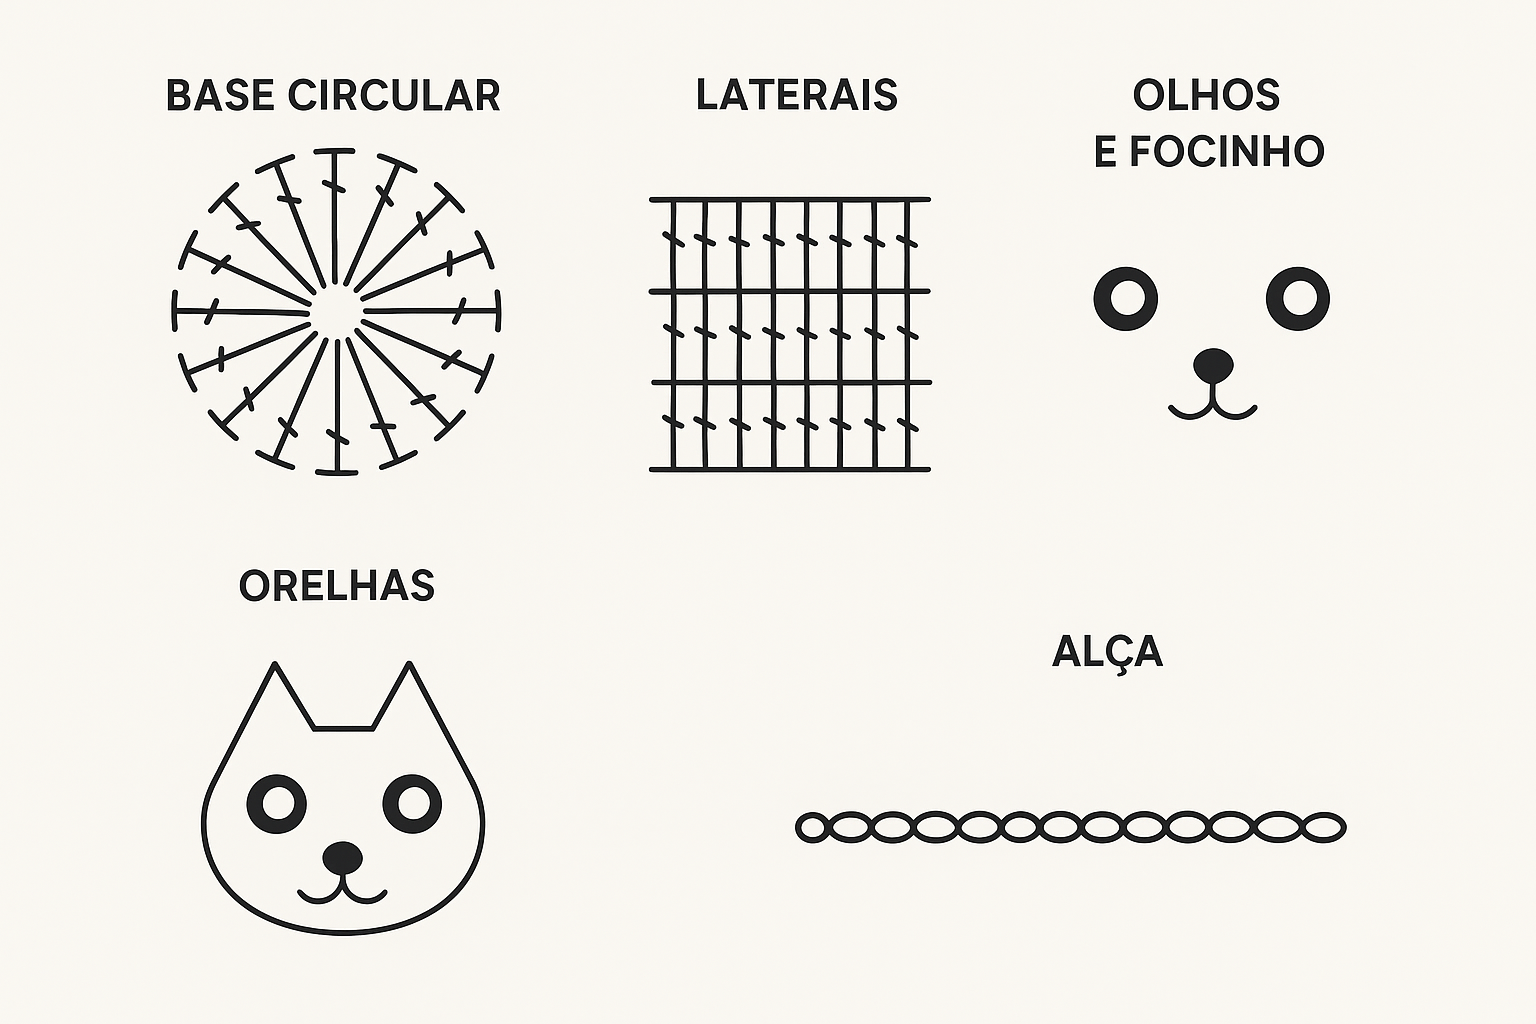
Now that you know the stitches and have your materials ready, let’s begin the step-by-step process:
This forms the bottom base of your crochet holder.
At this stage, you’ll have a basket-like structure.
Repeat on the opposite side to complete both ears.
This detail gives life and character to your crochet cat.
One of crochet’s greatest advantages is its endless personalization possibilities. Here are some creative variations:
This ensures each holder is one-of-a-kind.
This crochet project is not only practical but also highly versatile. Here are some ways to use it:
It’s also a fantastic gift idea and can even be sold as part of a handmade business, since crochet items hold great value in the artisan market.
The cat crochet holder is a charming and useful piece, simple enough for beginners yet creative enough for advanced crocheters. With just a few basic stitches and some dedication, you can make a handmade accessory that combines functionality, beauty, and creativity.
By following this step-by-step guide, you’ll be able to create your own unique crochet holder—whether to decorate your home, gift a loved one, or even start a small craft business. Crochet is more than just a technique: it’s an art form that expresses care and personality in every stitch.


